« SE4Binome2024-5 » : différence entre les versions
Aller à la navigation
Aller à la recherche
Aucun résumé des modifications |
Aucun résumé des modifications |
||
| Ligne 2 : | Ligne 2 : | ||
Carte fille clavier "matrice de touches" | Carte fille clavier "matrice de touches" | ||
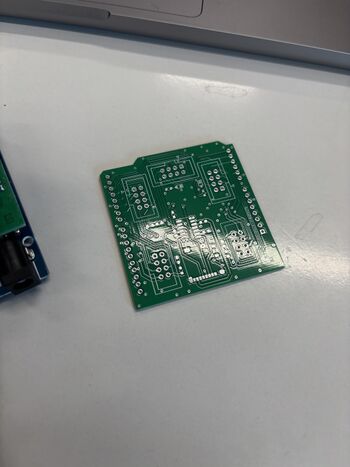
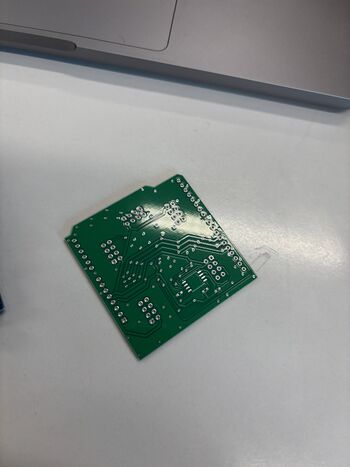
=== Reçu carte vierge === | |||
[[Fichier:Carte Recto non soudé.jpg|vignette|left|thumb|350px|Recto de la carte avant soudage des composants]] | |||
[[Fichier:Verso non solder.jpeg.jpg|vignette|thumb|right|350px|Verso de la carte avant soudage des composants]] | |||
=== Carte après soudure des composants === | |||
[[Fichier:Vid_test_carte.mov|vignette|thumb|center|700px|Photo de la carte avec composants soudés]] | |||
= Software = | |||
== Allumage de LEDS sur Programmateur AVR == | |||
Avant de programmer directement sur le shield, nous avons allumé des LED pour tester la carte. | |||
<syntaxhighlight lang="c" line> | |||
// the setup function runs once when you press reset or power the board | |||
void setup() { | |||
// initialize digital pin LED_BUILTIN as an output. | |||
pinMode(LED_BUILTIN, OUTPUT); | |||
} | |||
// the loop function runs over and over again forever | |||
void loop() { | |||
digitalWrite(1, HIGH); | |||
digitalWrite(4, HIGH); | |||
digitalWrite(7, HIGH); | |||
digitalWrite(A0, HIGH); | |||
digitalWrite(A3, HIGH); // turn the LED on (HIGH is the voltage level) | |||
delay(1000); // wait for a second | |||
digitalWrite(1, LOW); | |||
digitalWrite(4, LOW); | |||
digitalWrite(7, LOW); | |||
digitalWrite(A0, LOW); | |||
digitalWrite(A3, LOW); // turn the LED off by making the voltage LOW | |||
delay(1000); // wait for a second | |||
} | |||
</syntaxhighlight> | |||
Version du 1 octobre 2024 à 13:01
git : https://gitea.plil.fr/ktouron/se4-djadja-touron_pico.git
Carte fille clavier "matrice de touches"
Reçu carte vierge
Carte après soudure des composants
Software
Allumage de LEDS sur Programmateur AVR
Avant de programmer directement sur le shield, nous avons allumé des LED pour tester la carte.
// the setup function runs once when you press reset or power the board
void setup() {
  // initialize digital pin LED_BUILTIN as an output.
  pinMode(LED_BUILTIN, OUTPUT);
}

// the loop function runs over and over again forever
void loop() {
  digitalWrite(1, HIGH);
  digitalWrite(4, HIGH);
  digitalWrite(7, HIGH);
  digitalWrite(A0, HIGH);
  digitalWrite(A3, HIGH);  // turn the LED on (HIGH is the voltage level)
  delay(1000);                      // wait for a second
  digitalWrite(1, LOW);
  digitalWrite(4, LOW);
  digitalWrite(7, LOW);
  digitalWrite(A0, LOW);
  digitalWrite(A3, LOW);   // turn the LED off by making the voltage LOW
  delay(1000);                      // wait for a second
}

